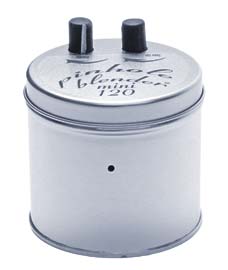
The Pinhole Blender Mini 120
In the following pages you will see how
easy it is to make wonderful photographs using a Mini Blender.
The Pinhole Blender Mini120 uses one pinhole or zone plate lens
to multiple expose your subjects into a collaged panorama. Please
take a few moments to familiarize yourself with your new camera
and learn how to load, advance and shoot with this exciting new
Back to Cameras Page.
Back to Cameras Page.
Loading the Camera

This
camera comes with two lenses attached to a magnet. Position this
on the inside of the camera with the writing facing inwards. Position
the lens of your choice over the hole in the camera. The pinhole
lens has an f-stop of 200. The zone plate has and f stop of 64.
Use the enclosed exposure chart to calculate exposures based upon
a light meter reading.
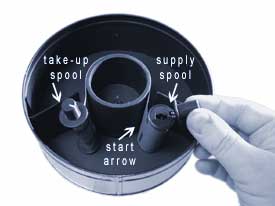
Hold
the camera in front of you with the pinhole pointing forwards.
Supply 120/220 film roll goes on right. Take-up spool goes on
left. Tape paper leader to take-up reel to insure positive advance
of film. Film advance knob (take-up spool side) turns in clockwise
direction. Use knob line and counter mark as guide. Advance film
in light until lateral 120/220 START ARROW is aligned next to
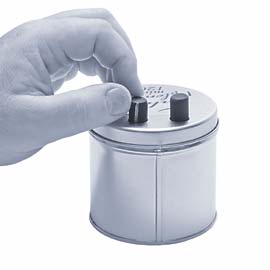
center core. Insert spool adapters knobs on top of supply and
take-up spools before closing lid.
* This picture is for illustration purposes only, its from the original 120. Your mini 120 will have tighter spacing between film spools and can edges.
* This picture is for illustration purposes only, its from the original 120. Your mini 120 will have tighter spacing between film spools and can edges.
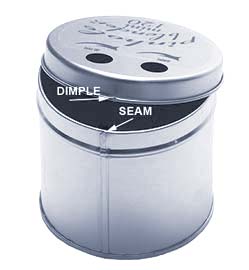
To insure
proper alignment of film transport system, align can seam with dimple
indicator on edge of camera lid.
When winding the film, release tension on the supply side knob first, then wind up the slack with the take-up side knob.
Use
the line on the knob as a guide to advance the film using advance
side turning knob, turning in a clockwise direction. Following
the arrows marked on the label, turn advance knob 7 complete revolutions
in clockwise direction to set camera for image #1. After shooting
each image turn film advance a third (1/3) a rotation to advance
film so that the each image will blend into one continuous blended
montage. Alternatively you can rotate the advance knob more to
give further separation to your image. Advancing a whole turn
will leave you with individual spaced images.You
will get approximately 45 blended exposures using 1/3 turns in
a roll of 120 or 15 separate image using 1 full rotation between
exposures.
Use
the Pinhole Blender logo magnet as a shutter to cover the lens hole
on the outside of the camera. Some customers prefer to use black
photographers tape or electrical tape to cover the lenses or to
secure the lid to the camera. body.
Shooting:
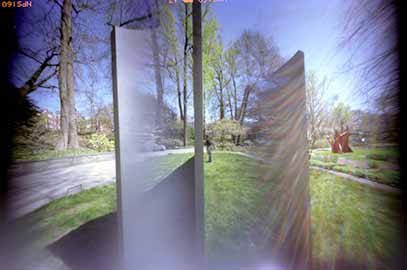
This image shows the blending of three image segments into one collaged picture. The camera was moved to a different angle for each shot. The rainbow streaks on the right are caused by diffraction of the sun as it flairs through the pinhole. Some like this effect. To prevent it don't point your camera into the sun or shade the lens from receiving direct sunlight.
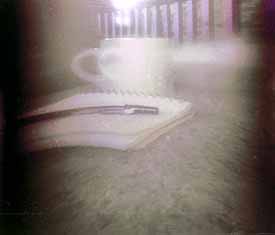
This image used the zone plate lens and individual frame advance to isolate the image with a gradual fade to black on either side.
The zone plate will produce a fuzzy dream like image. For more information on zone plate photography check this link out.
Zone Plate: a Quasi Scientific Explanation
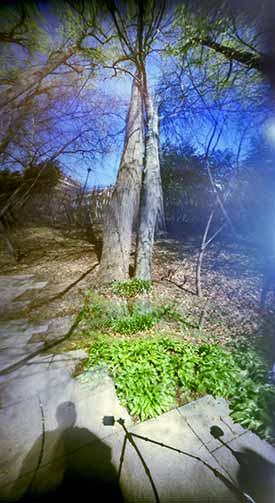
You can make a continuous panorama by panning the camera in the direction the the film advances. For this image the camera was held vertically and pointed at the tree top to start this image. The camera top controls were on the left side as I was facing the tree. After each exposure the film was advanced 1/3 a revolution and the camera was twisted down approximately 60 degrees. Care must be taken to ensure proper exposure through the entire length of the panorama.
A horizontal panorama may be made the same way. Start your pan on the right and pan toward the left. Your pan is traveling the same direction that the film advances producing a continuous panorama.
To see more images made with the Pinhole Blender mini 120 check out my Flickr page.
A horizontal panorama may be made the same way. Start your pan on the right and pan toward the left. Your pan is traveling the same direction that the film advances producing a continuous panorama.
To see more images made with the Pinhole Blender mini 120 check out my Flickr page.